How to Start an Escrow Transaction on BrokerBin
When dealing with big transactions in the global circular tech economy, it’s important to take steps to protect yourself as a buyer or seller. One easy way to do so is to use an escrow transaction as a secure payment service.
BrokerBin has an official partnership with Escrow.com, a licensed, regulated third party that holds funds securely until both buyer and seller have fulfilled the terms of the transaction.
This article provides a quick guide for starting an Escrow transaction from within the BrokerBin platform.
Why use Escrow.com?
Before we get into the step-by-step process for initiating an escrow transaction, let’s address your benefit for using Escrow.com.
By using Escrow.com, you – whether you’re the buyer or the seller – eliminate the risk of fraud and non-delivery that accompany high-value B2B equipment trades.
BrokerBin, a vetted, members-only community, seeks to provide resources to its members beyond the platform as members move into the transaction stage. Our partnership with Escrow.com helps to protect buyers and sellers during the transaction stage, ensuring the buyer receives the goods that were ordered and the seller receives payment.
Step 1: Set up an account with Escrow.com
To start an Escrow transaction on the BrokerBin platform, you’ll first need to register your company with Escrow.com. If you already have an account with Escrow.com, then you can skip this step.
Registration Guides:
Step 2: Fill out the Escrow.com form on BrokerBin
When you’re ready to start the Escrow transaction, fill out the form on the platform.
1. Select whether you’re the buyer or seller. Only one of you needs to initiate the transaction.
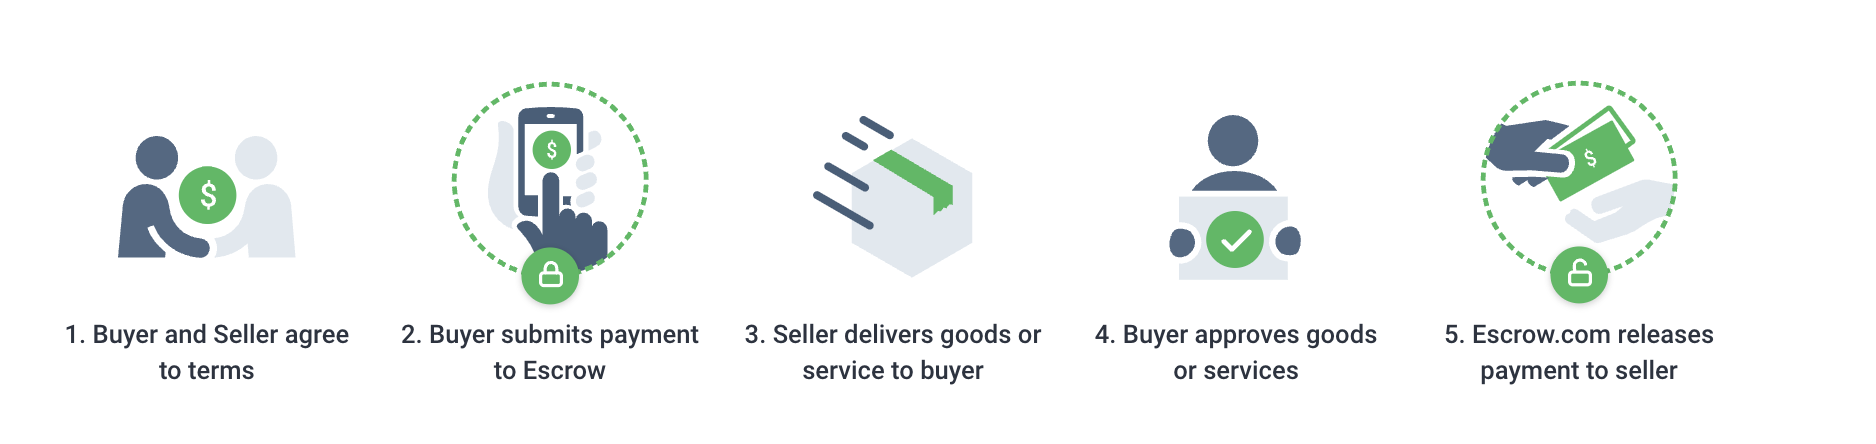
2. Review the following flow chart that appears on the screen. The buyer will have an inspection period of 3 days to approve the goods.
3. Fill out the contact information for both the buyer and seller.
4. Add each part – click ‘Add an item’ – for this transaction. Include the quantity, condition, price, and a detailed description for each part number.
5. Determine who will be responsible for the escrow fee – Buyer, Seller, or Split 50/50.
6. Designate who will be responsible for freight costs – Buyer or Seller.
7. Review everything you entered for accuracy, then click “Initiate Transaction”.
Step 3: Review your confirmation email
You’ll receive a confirmation email from Escrow.com noting that the transaction request has been received.
Following the confirmation email, Escrow.com will communicate with the seller when to ship the goods only after the buyer’s funds are securely held in an escrow account.
Once the buyer receives the goods, he has 3 days to inspect the goods. Upon approval of the purchase, Escrow.com sends the funds to the seller’s selected disbursement method.
Transaction completed!
Frequently Asked Questions
How long does the Escrow.com process take?
How does Escrow.com protect me as a user?
What are the fees in an Escrow.com transaction?
How do I check the status of my transactions?
What happens to my funds as a buyer?
When are funds released to the seller?